Nest 是一个用于构建高效,可扩展的 Node.js 服务器端应用程序的框架。它使用渐进式 JavaScript,内置并完全支持 TypeScript(但仍然允许开发人员使用纯 JavaScript 编写代码)并结合了 OOP(面向对象编程),FP(函数式编程)和 FRP(函数式响应编程)的元素。
在底层,Nest 使用强大的 HTTP Server 框架,如 Express(默认)和 Fastify。Nest 在这些框架之上提供了一定程度的抽象,同时也将其 API 直接暴露给开发人员。这样可以轻松使用每个平台的无数第三方模块。
安装
请确保您的操作系统上安装了 Node.js(版本 >= 20)。
安装Nest Cli
npm i -g @nestjs/cli创建项目
用户可以有nest new命令来创建项目,具体参数如图:
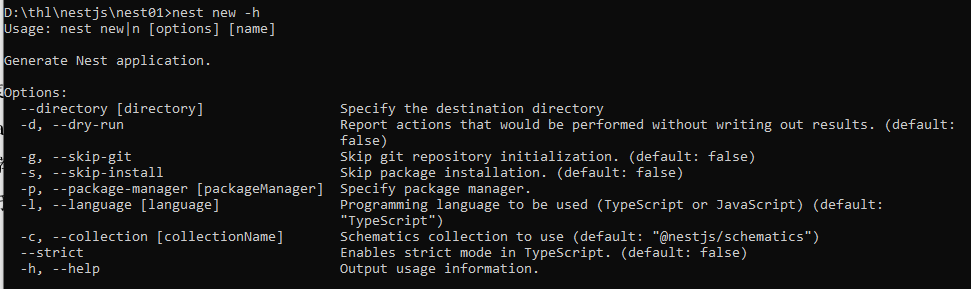
常用参数说明:
- —skip-git和—skip-install:这些参数用于跳过Git初始化和npm包安装步骤。
- —package-manageer:此参数用于指定项目使用的包管理器(npm、yarn、pnpm)。推荐使用pnpm,它作为继npm、yarn之后推出的包管理器,因其速度快、节省磁盘空间而受到青睐。
- —language:此参数决定使用TypeScript还是JavaScript进行编写。推荐使用默认的TypeScript。
- —collection:用于指定工作流集合。默认是@nextjs/schematics,用于快速创建模块、控制器、服务等,与
nest generate命令相关。通常使用默认值。 - —strict:此参数用于指定TypeScript是否以严格模式运行。
nest new project-name
#指定包管理器
nest n cli-test -p pnpm
命令简写:nest n project-name
运行应用程序
安装过程完成后,您可以在系统命令行工具中运行以下命令,以启动应用程序:
npm run start要监听文件中的更改,您可以运行以下命令来启动应用程序:
npm run start:dev生成指定代码
执行nest generate -h 命令来生成指定的代码片段,可以查看其中包含的内容,如下图:
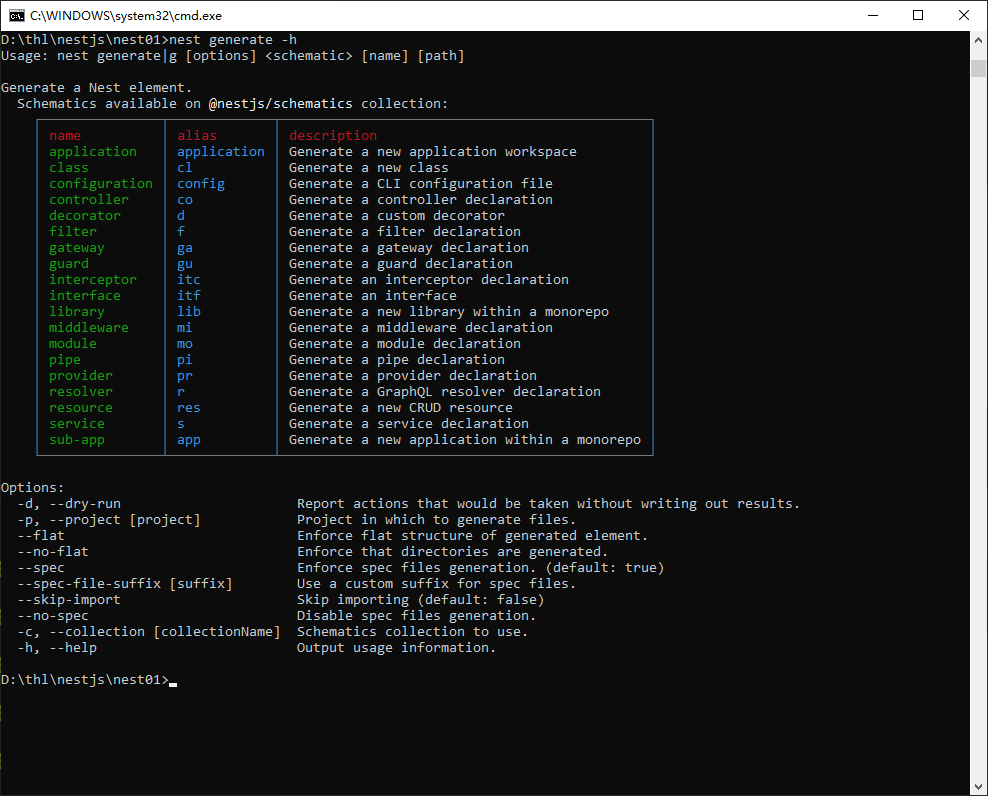
其中包含丰富的Nest元素(如Controller、Decorator、Filter等),同时提供了灵活的参数控制。
创建控制器
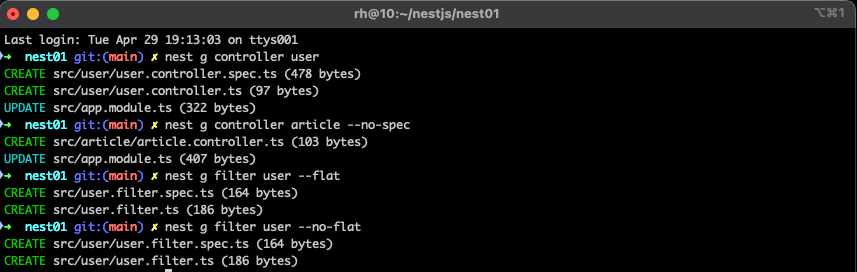
执行nest g controller命令
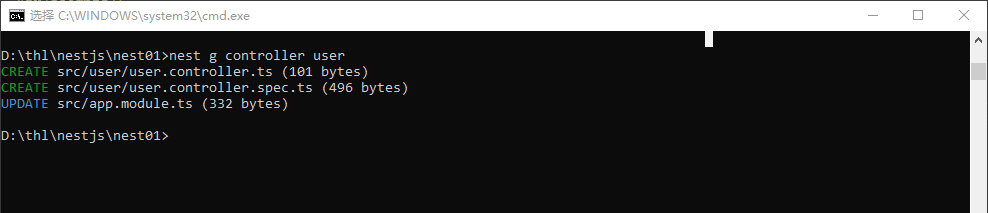
nest g controller user
其中,.spec.ts是单元测试文件,可以通过设置—no-spec参数表明不生成测试文件.
- —flat和—not-flat这两个参数表示是否使用扁平化结构。我们接着创建一个user过滤器来测试。
- —flat:参数表示扁平化,会将生成的文件放到src目录下,而不生成对应的目录。
- —not-flat:参数表示非扁平化,会生成对应的目录。
- —skip-import 表示是否跳过自动导入依赖,默认情况下会自动导入,以 user controller 为例
批量生成模板
然而,逐个创建 Controller 或 Filters 可能不够方便。能否一次性生成所需的模板呢?当然可以,使用命令nest g resource person,选择 REST 风格的 API
➜  nest01 git:(main) ✗ nest g resource person
? What transport layer do you use? (Use arrow keys)
❯ REST API
  GraphQL (code first)
  GraphQL (schema first)
  Microservice (non-HTTP)
  WebSockets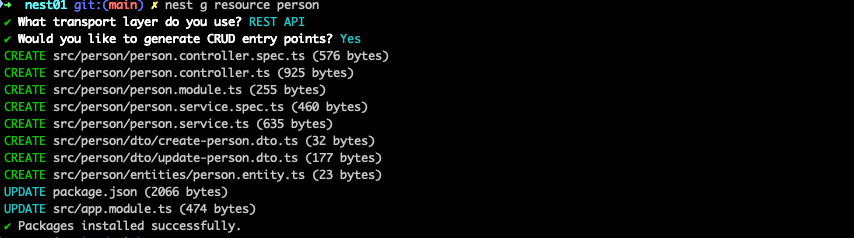
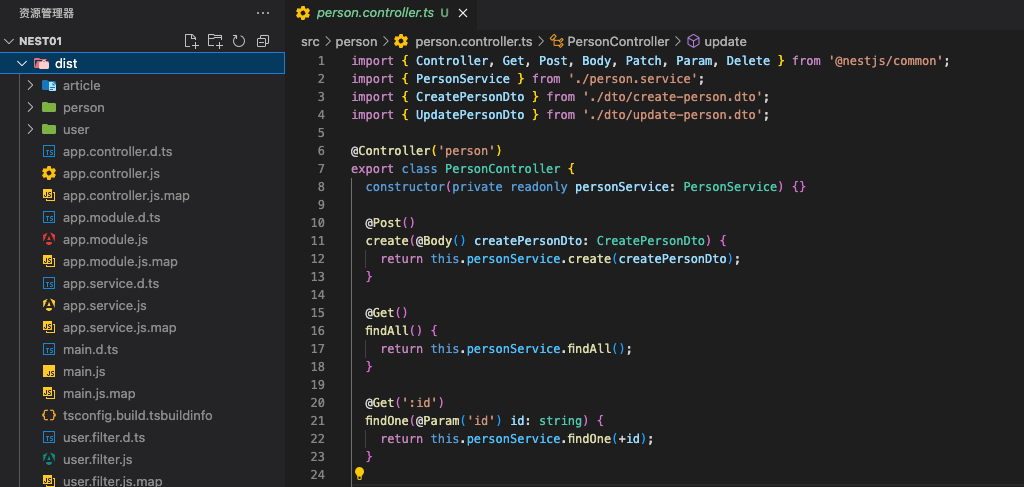
创建完成后,生成的 REST 风格的 APIperson.controller.ts,内容如下:
import { Controller, Get, Post, Body, Patch, Param, Delete } from '@nestjs/common';
import { PersonService } from './person.service';
import { CreatePersonDto } from './dto/create-person.dto';
import { UpdatePersonDto } from './dto/update-person.dto';

@Controller('person')
export class PersonController {
  constructor(private readonly personService: PersonService) {}

  @Post()
  create(@Body() createPersonDto: CreatePersonDto) {
    return this.personService.create(createPersonDto);
  }

  @Get()
  findAll() {
    return this.personService.findAll();
  }

  @Get(':id')
  findOne(@Param('id') id: string) {
    return this.personService.findOne(+id);
  }

  @Patch(':id')
  update(@Param('id') id: string, @Body() updatePersonDto: UpdatePersonDto) {
    return this.personService.update(+id, updatePersonDto);
  }

  @Delete(':id')
  remove(@Param('id') id: string) {
    return this.personService.remove(+id);
  }
}
构建应用
执行 nest build -h 命令,可以看到 build 命令提供了一些可选参数,如图所示
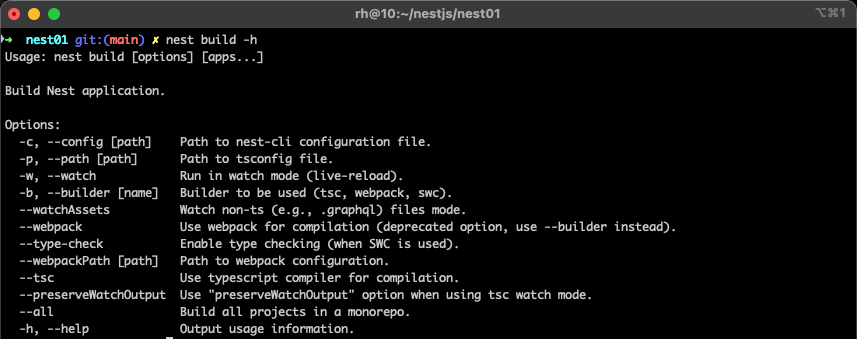
其中,各选项说明如下:
-
—path:用于指定 tsconfig 文件的路径。
-
—watch:开启实时监听模式,在文件发生变化时自动执行构建操作。
-
—builder:选择使用指定的工具进行构建,可选的工具包括tsc、webpack、swc 等。
-
—config:指定 nest-cli 的配置文件路径,即nest-cli.json 文件,可以用来配置打包参数
{
  "$schema": "https://json.schemastore.org/nest-cli",
  "collection": "@nestjs/schematics",
  "sourceRoot": "src",
  "generateOptions": {
    "flat": false,
    "spec": true
  },
  "compilerOptions": {
    "webpack": false,
    "deleteOutDir": true,
    "builder": "tsc",
    "watchAssets": false
  }
}
默认情况下,Nest 使用 tsc 进行编译,运行 nest build 命令的效果如图所示
若要切换为使用 webpack 进行打包,可以运行 nest build -b webpack 命令,效果如图
开发调试
使用 nest start 命令来启动开发调试,它的可选参数如下
➜  nest01 git:(main) ✗ nest start -h
Usage: nest start [options] [app]

Run Nest application.

Options:
  -c, --config [path]        Path to nest-cli configuration file.
  -p, --path [path]          Path to tsconfig file.
  -w, --watch                Run in watch mode (live-reload).
  -b, --builder [name]       Builder to be used (tsc, webpack, swc).
  --watchAssets              Watch non-ts (e.g., .graphql) files mode.
  -d, --debug [hostport]     Run in debug mode (with --inspect flag).
  --webpack                  Use webpack for compilation (deprecated option, use --builder instead).
  --webpackPath [path]       Path to webpack configuration.
  --type-check               Enable type checking (when SWC is used).
  --tsc                      Use typescript compiler for compilation.
  --sourceRoot [sourceRoot]  Points at the root of the source code for the single project in standard mode structures,
                             or the default project in monorepo mode structures.
  --entryFile [entryFile]    Path to the entry file where this command will work with. Defaults to the one defined at
                             your Nest's CLI config file.
  -e, --exec [binary]        Binary to run (default: "node").
  --preserveWatchOutput      Use "preserveWatchOutput" option when using tsc watch mode.
  --shell                    Spawn child processes within a shell (see node's child_process.spawn() method docs).
                             Default: true. (default: true)
  --no-shell                 Do not spawn child processes within a shell.
  --env-file [path]          Path to an env file (.env) to be loaded into the environment. (default: [])
  -h, --help                 Output usage information.
—debug 参数用来调试。运行 nest start -d 命令后启动一个 WebSocket调试服务,通过调试工具链接到这个端口即可进行调试。其它配置与 build 命令类似。
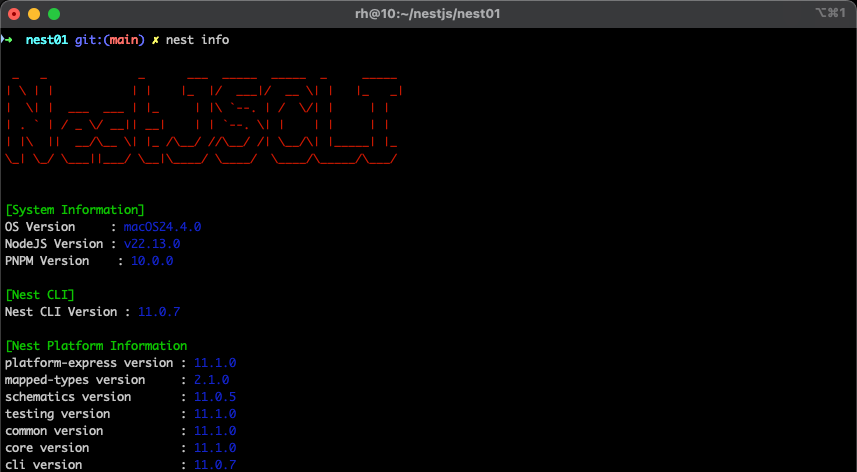
项目信息
Nest info 命令用于查看 Node.js、npm 以及 Nest 依赖包的相关版本信息。如图所示: